
Fiberglass Repair – Stitching the Wound
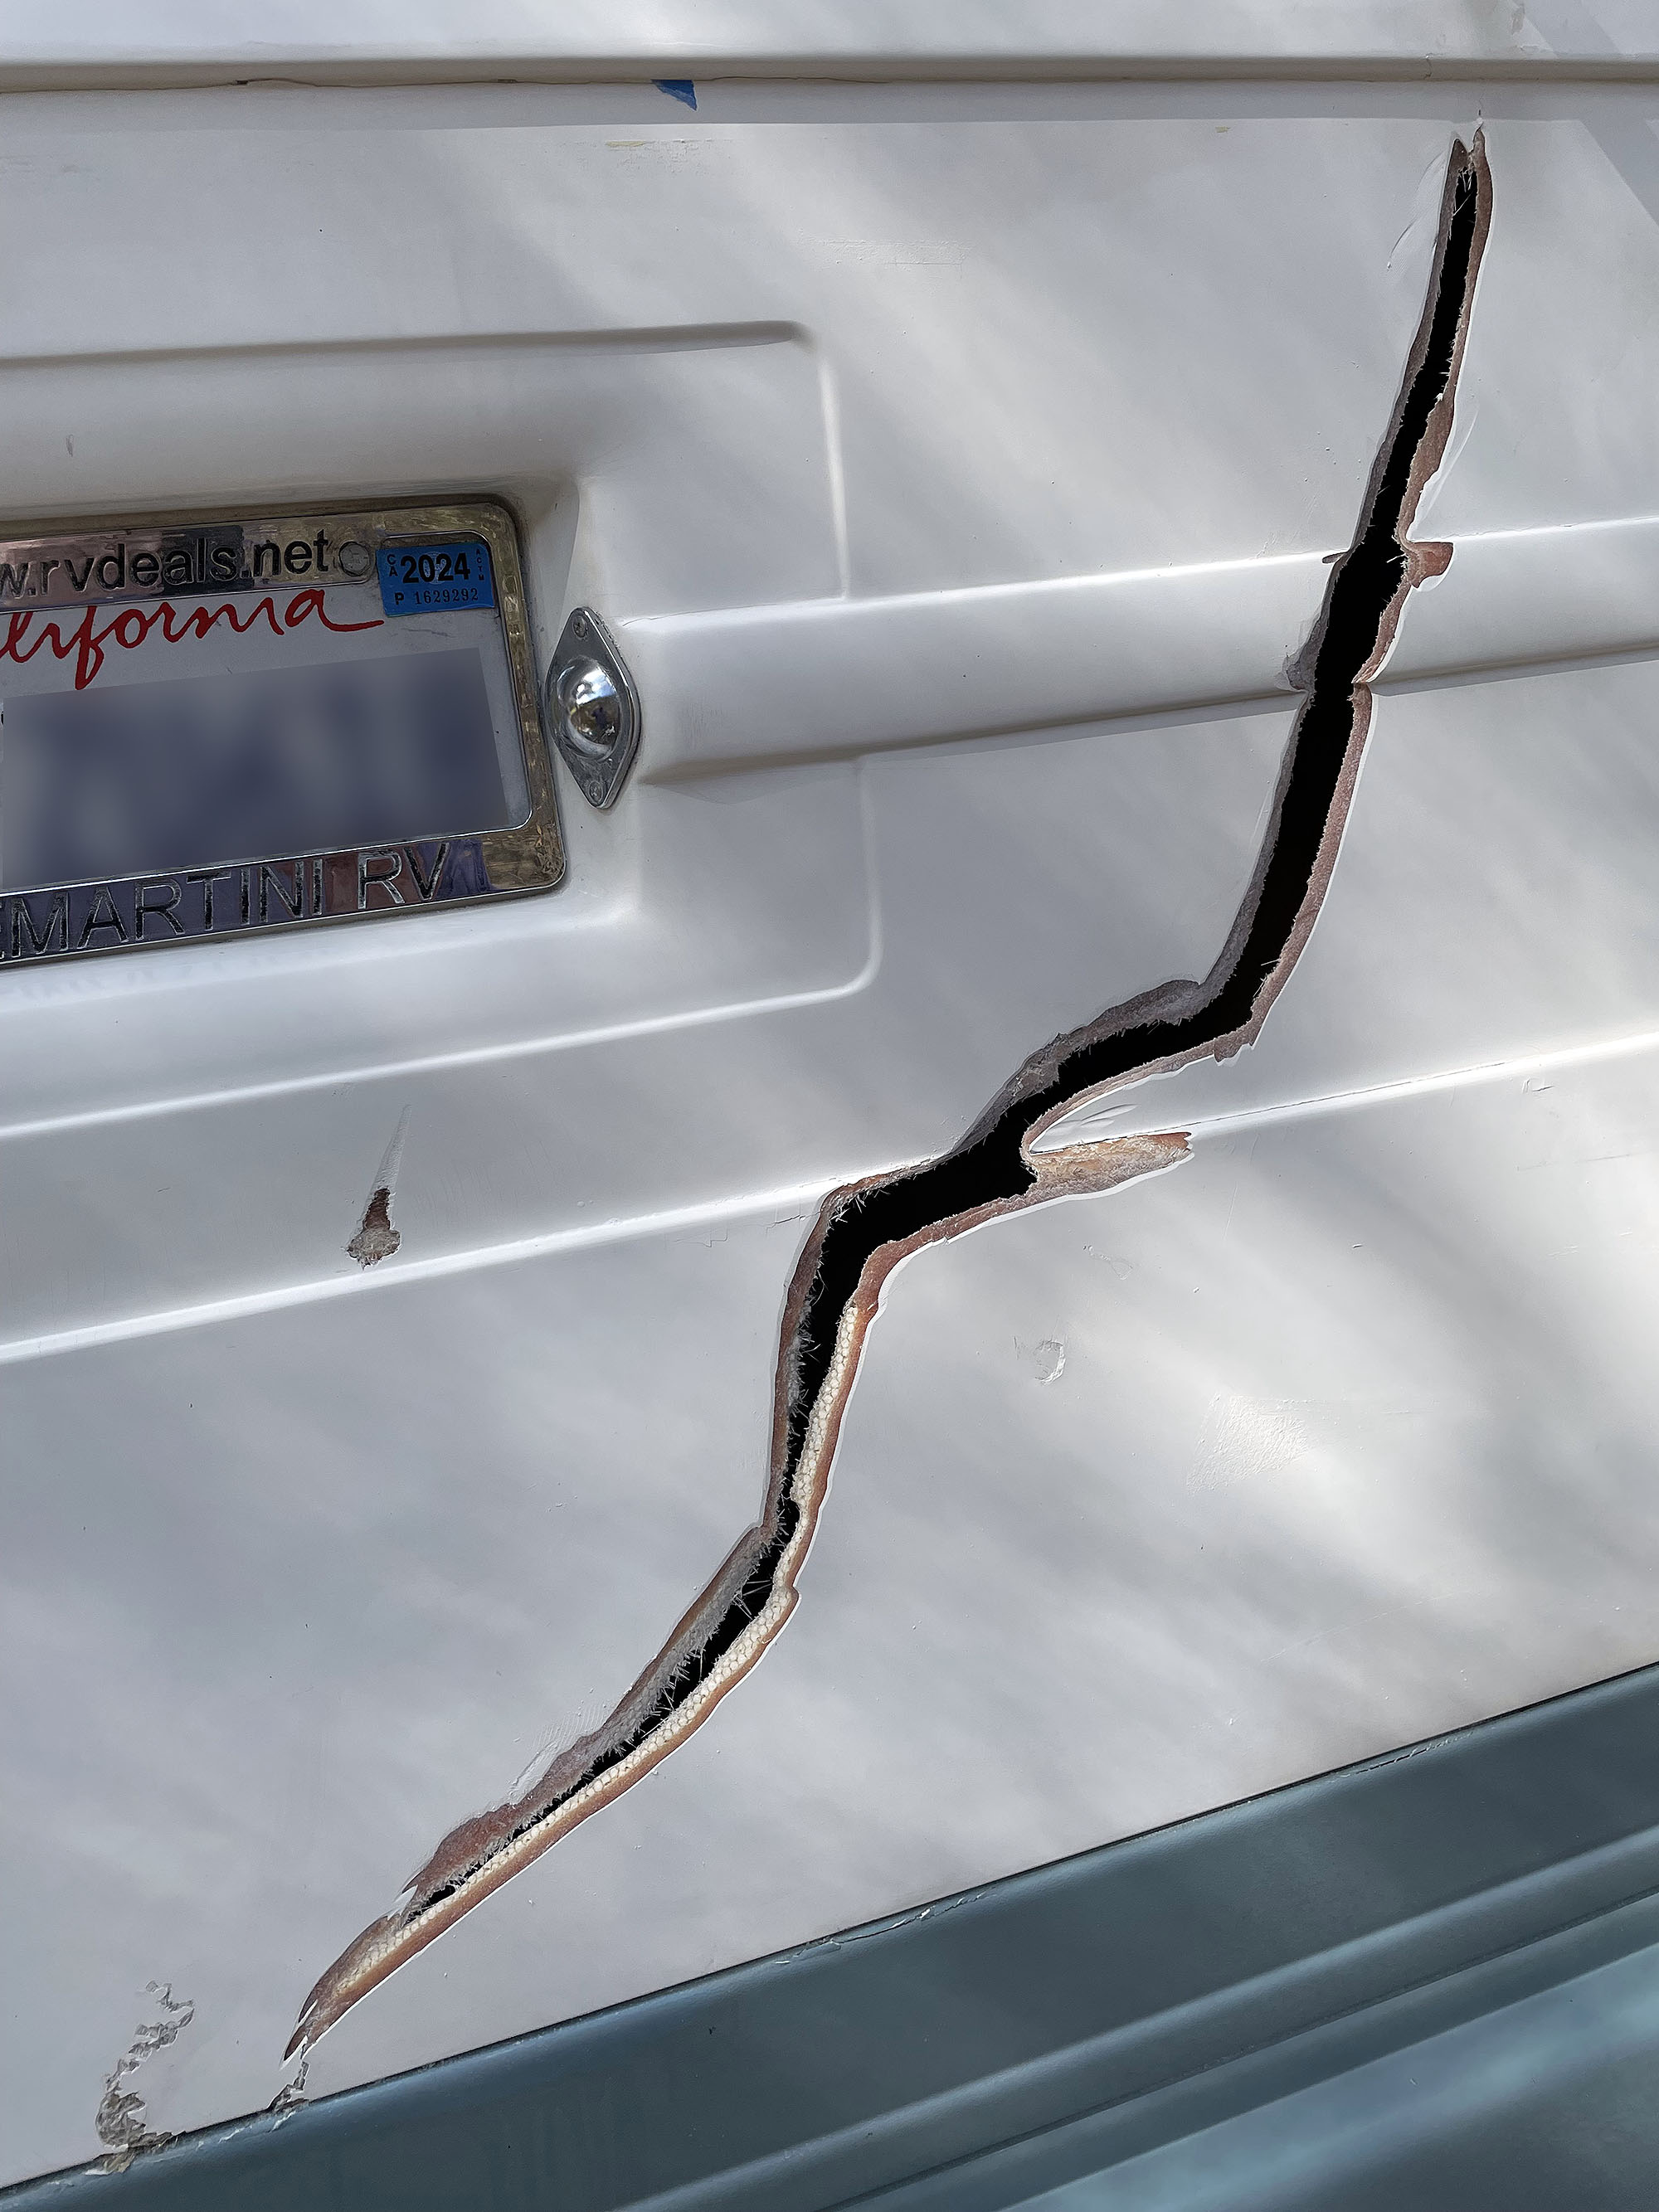
From what I gleaned from dozens of fiberglass repair YouTube videos is that fiberglass damage should be repaired from both sides if possible.
It was not possible in our case as there is only about 6 inches a space behind my RV’s damaged rear cap. Not nearly enough space to work in. What to do?
First, I used an angle grinder to grind down each side of the wound into a sort of V-shape.
Next, I cut several pieces of 1/2″ x 4″ Balsa wood strips to fit in back of the damaged rear cap. Balsa wood is very porous allowing fiberglass resin to penetrate.
Each wood strip was liberally coated with PL 400 adhesive and then lifted up into place with a metal string. Very, very clumsy.
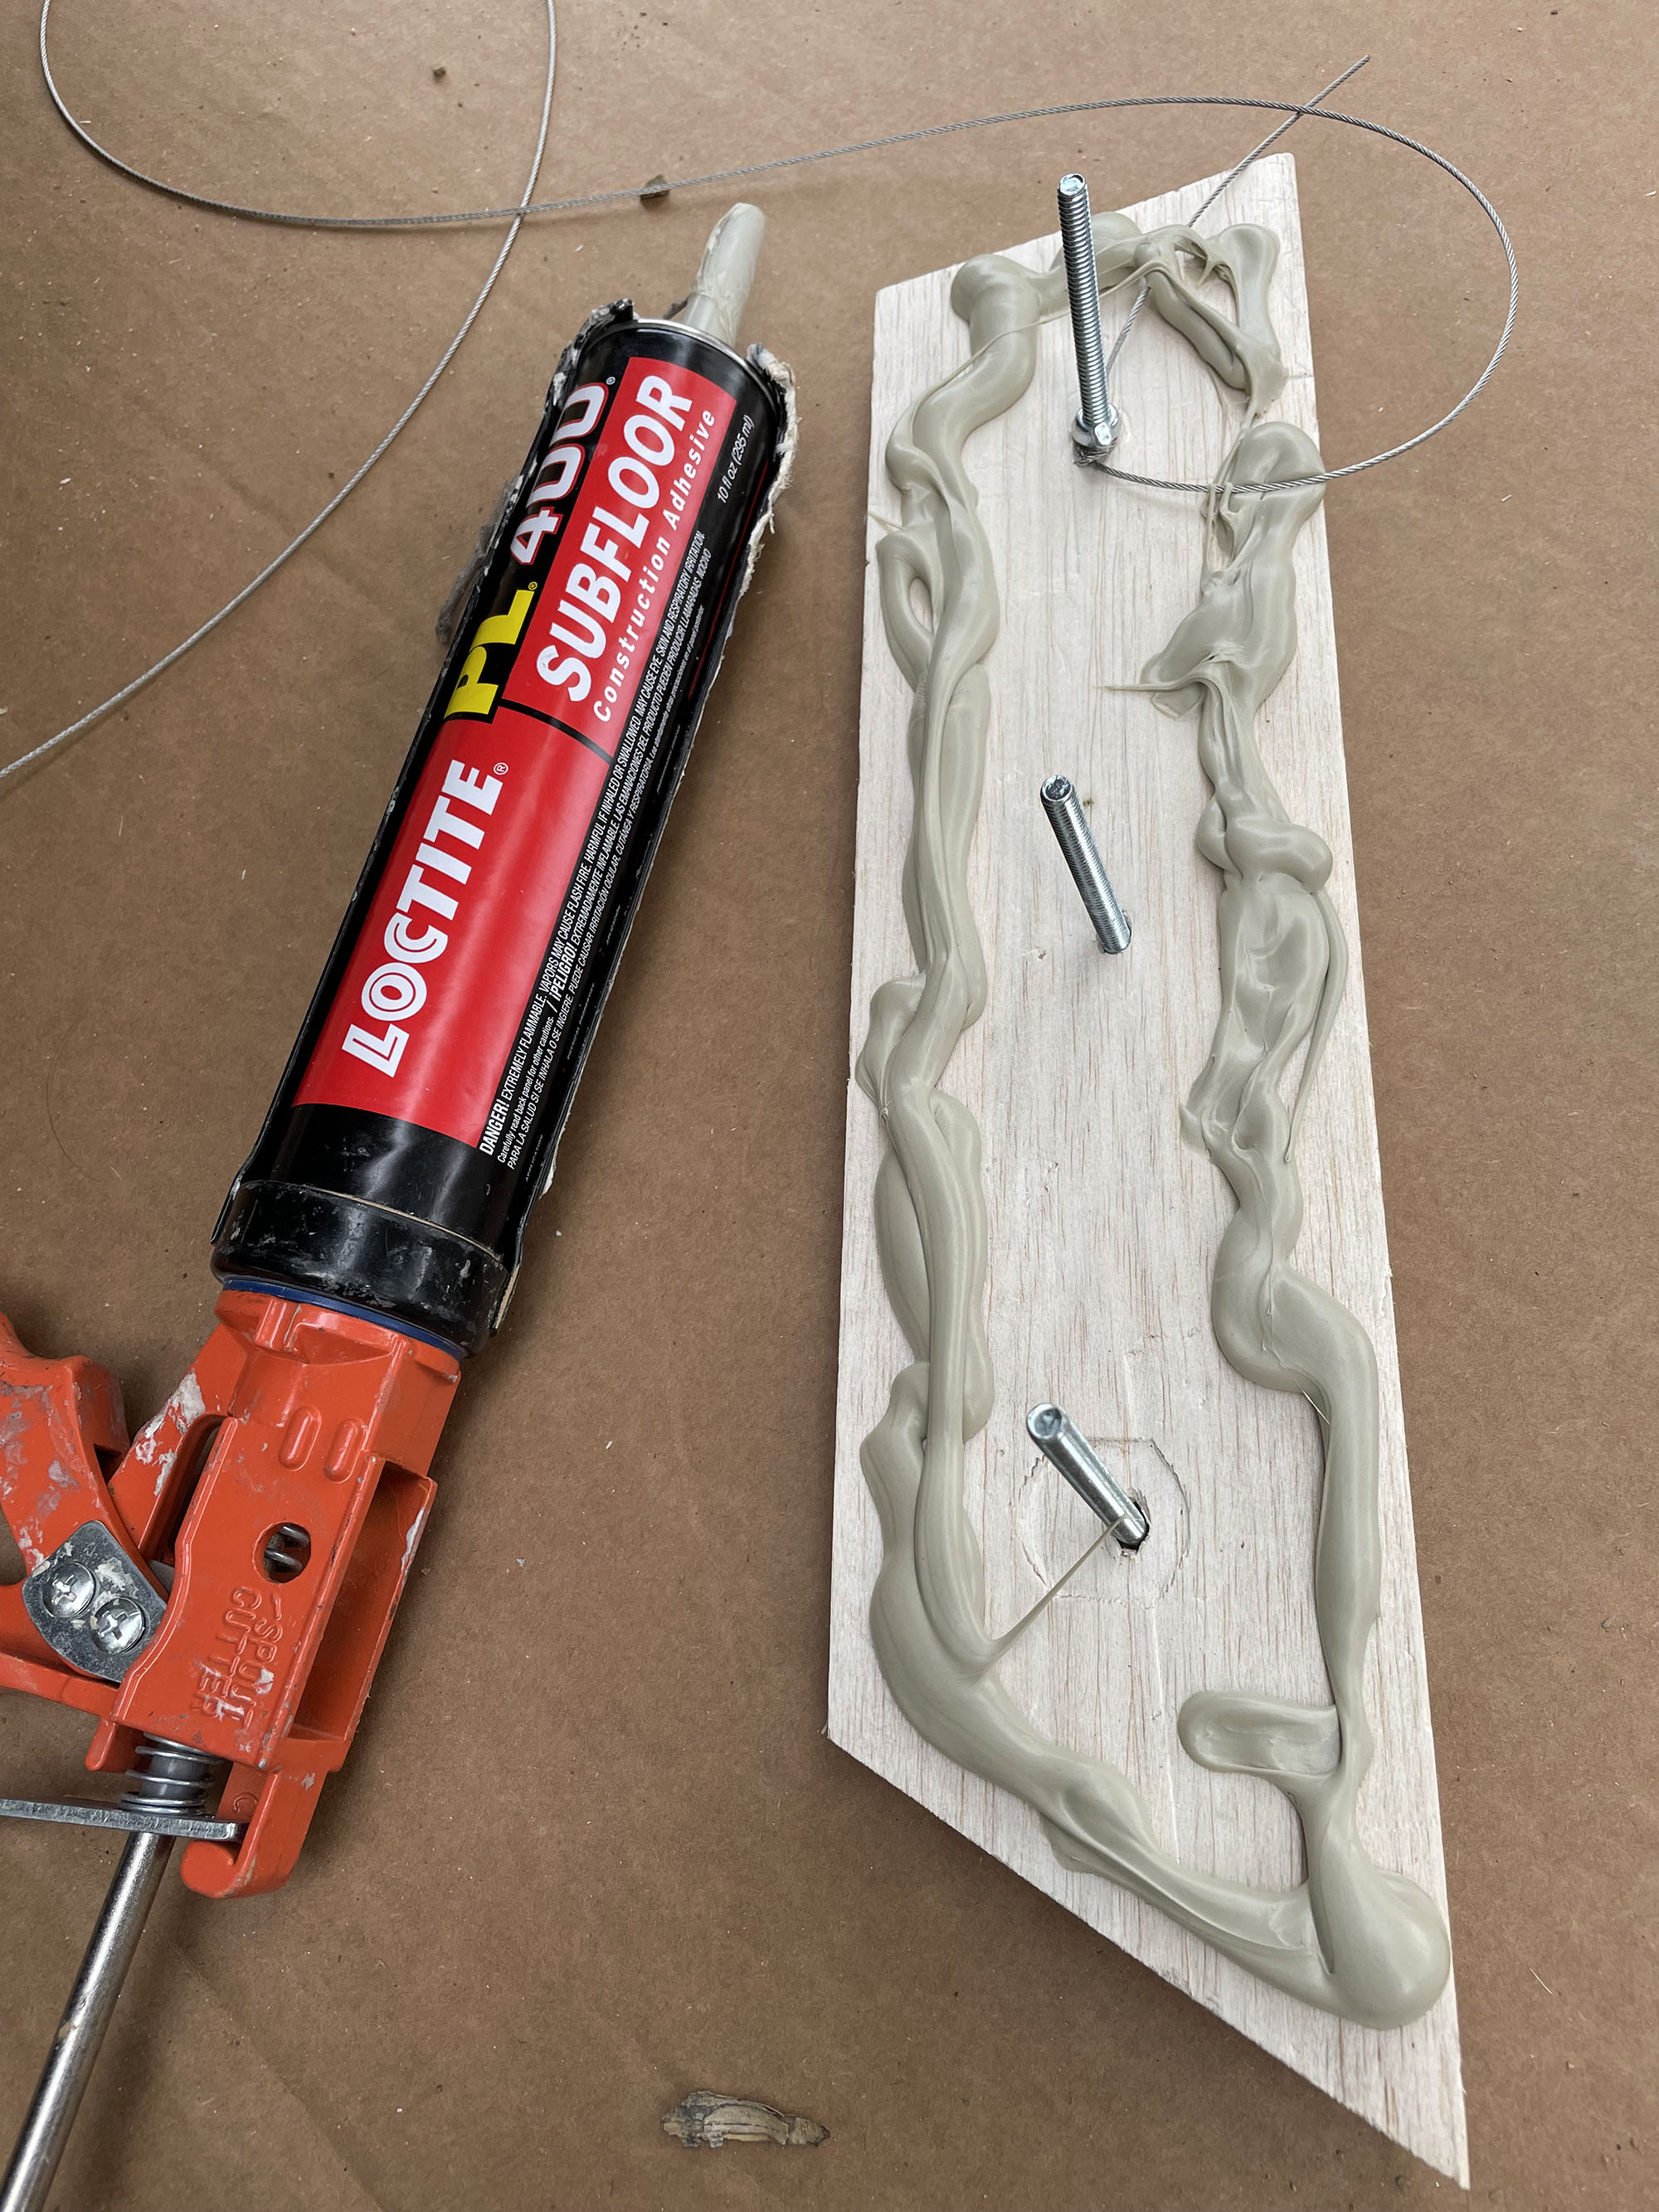
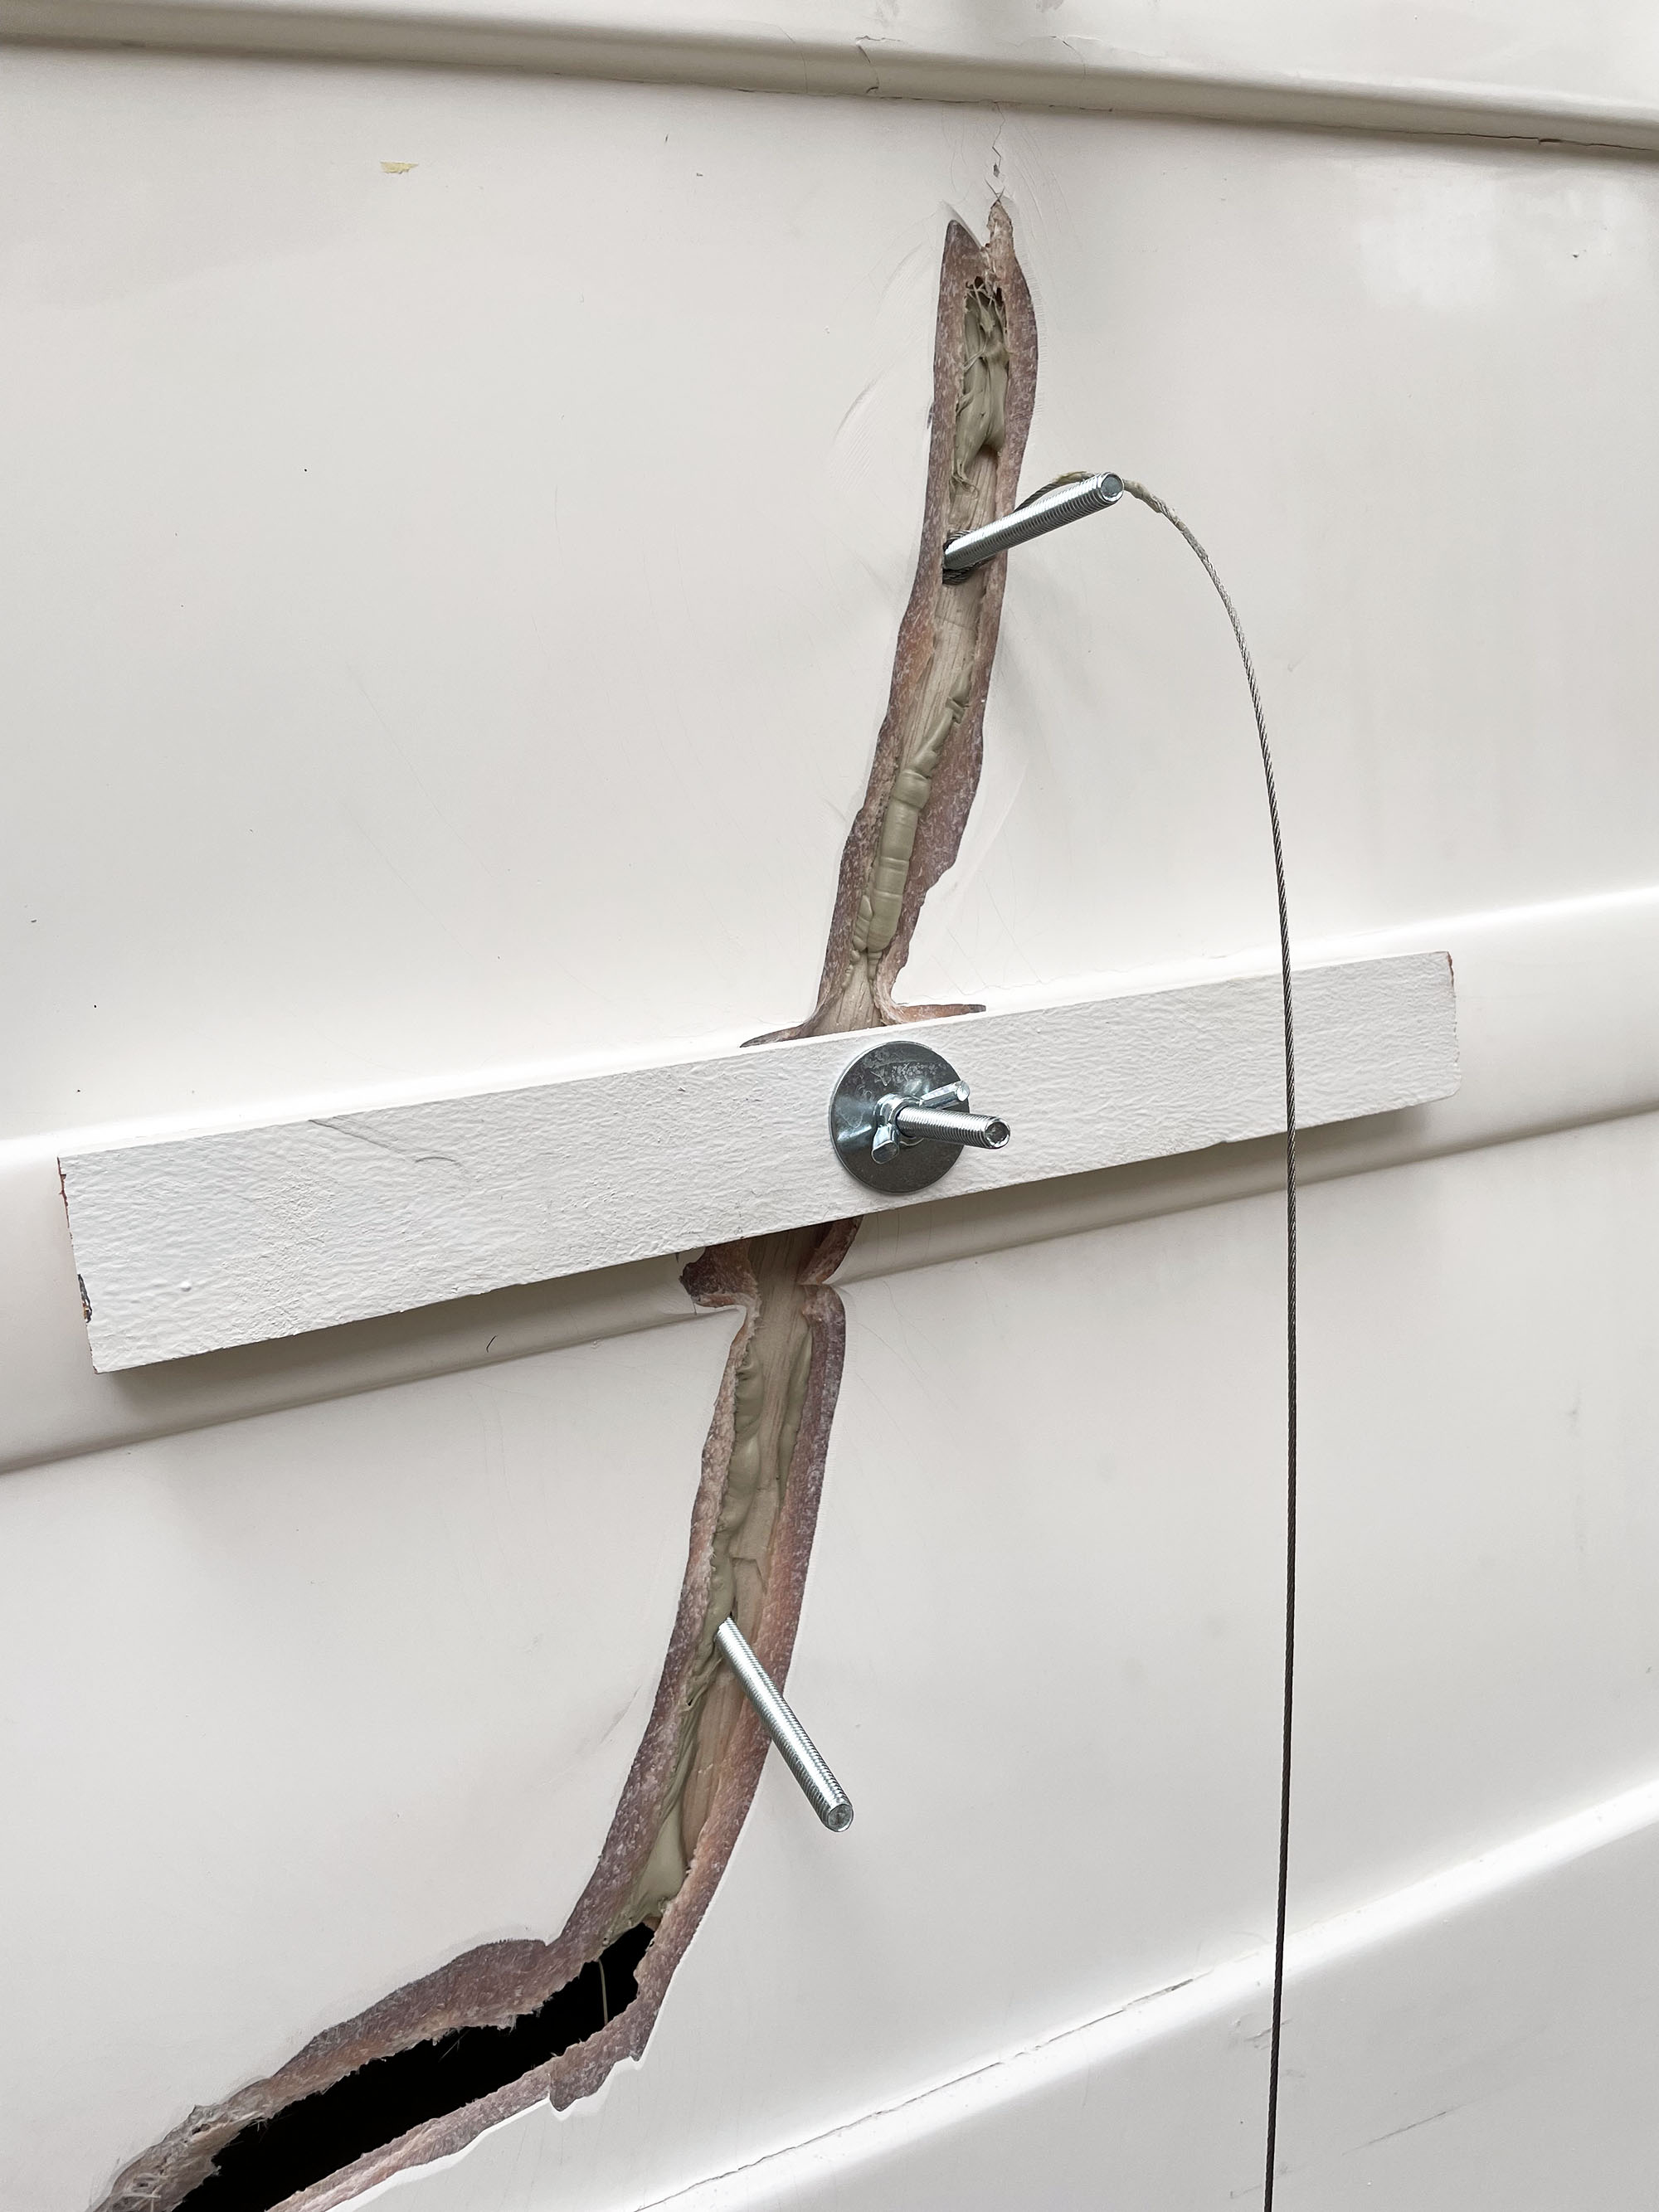
I used six Balsa wood “stitches” to hold both damaged sides together:
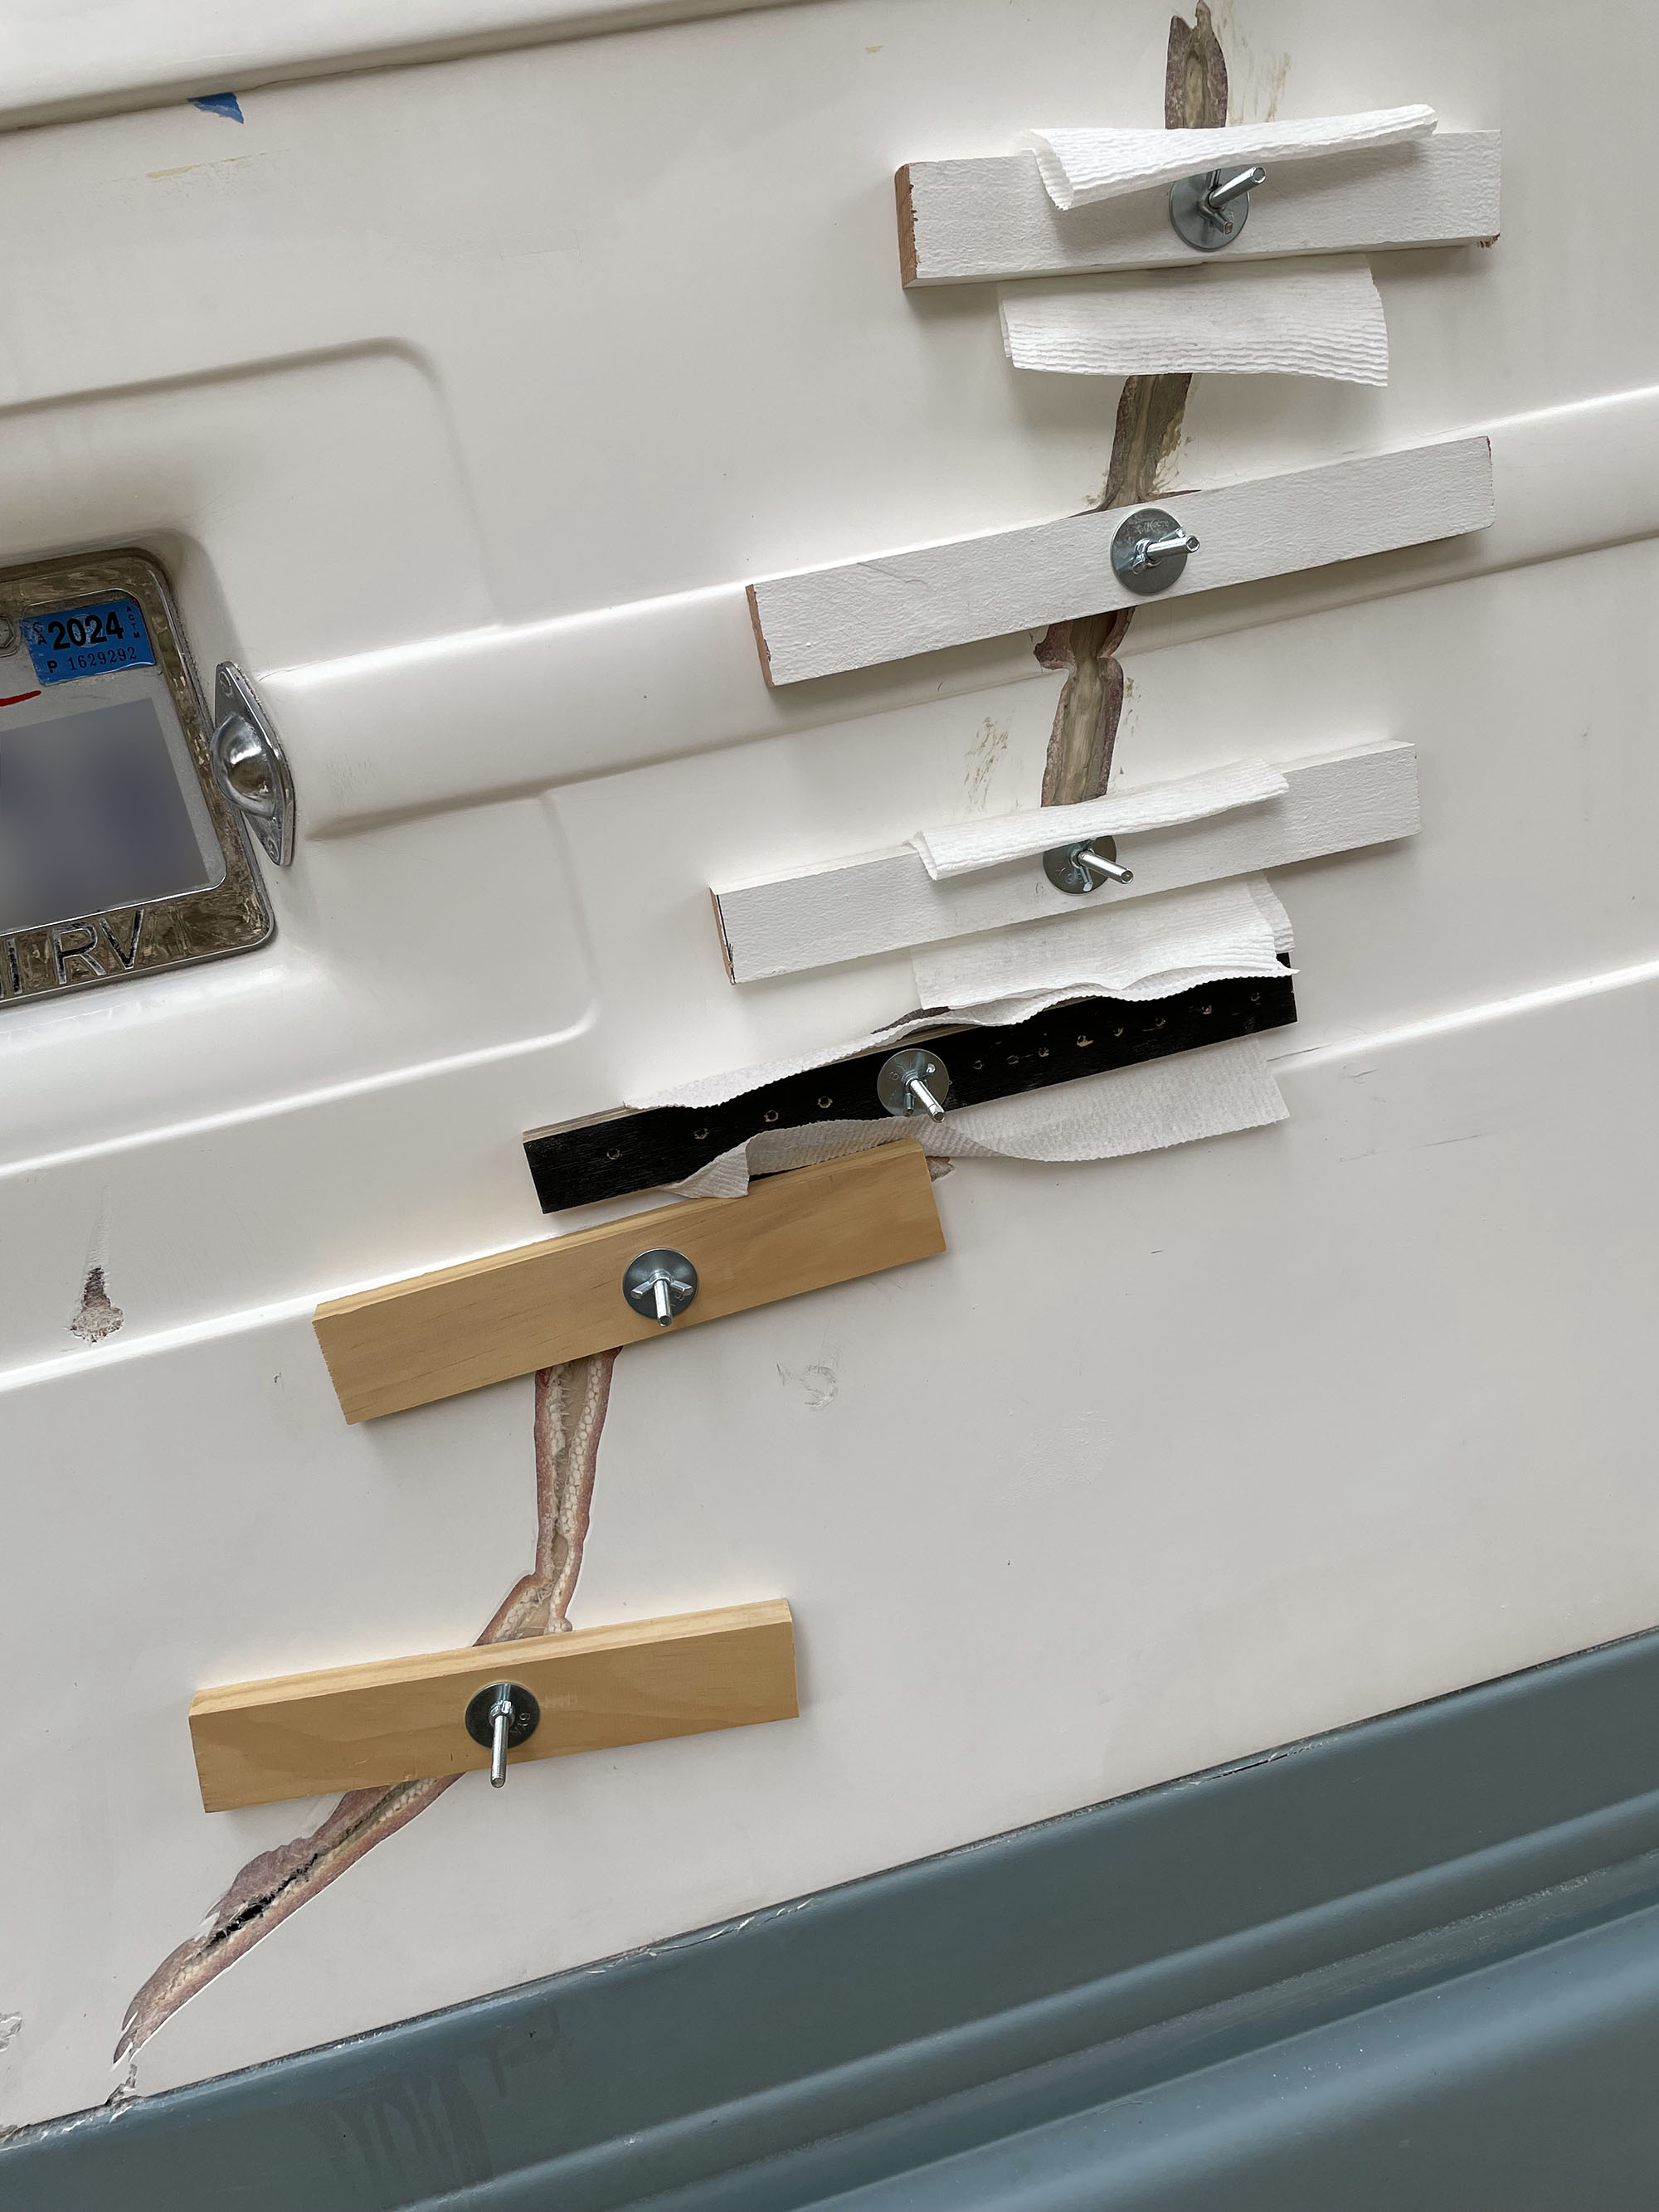
Even though I took great lengths to prevent the PL 400 adhesive from contacting the wood stitches, I was still worried that it might, and that removing stitches could be very difficult.
Needless worries it turned out.
Each stitch came off effortlessly (even the paper cloth) and each bolt was pushed back until it fell on the ground.

Next Step – Glassing
Waiting for the temperature to warm up . . .


May I call u if I have a problem ??
Fur cryin’ out loud.. Genius! Glad we had talk about this yesterday. You have thought through the whole process to the nth degree Tom.. Bravo! Looking forward to the ‘glassing’ part after watching the process on YouTube. Fascinating. Sister Mary
This was very interesting. Will be sure to watch the follow up.