Bits & Pieces
So much for the 70-degree temps . . .

However, down in the Valley . . .


Parting Shot


Feb 22
So much for the 70-degree temps . . .
However, down in the Valley . . .
Parting Shot
Feb 18
UPDATE: About a week after getting my RV steps to work, my repaired step motor finally gave up the ghost. Soooooo, luckily I had that new step motor which I promptly installed. Lovely.
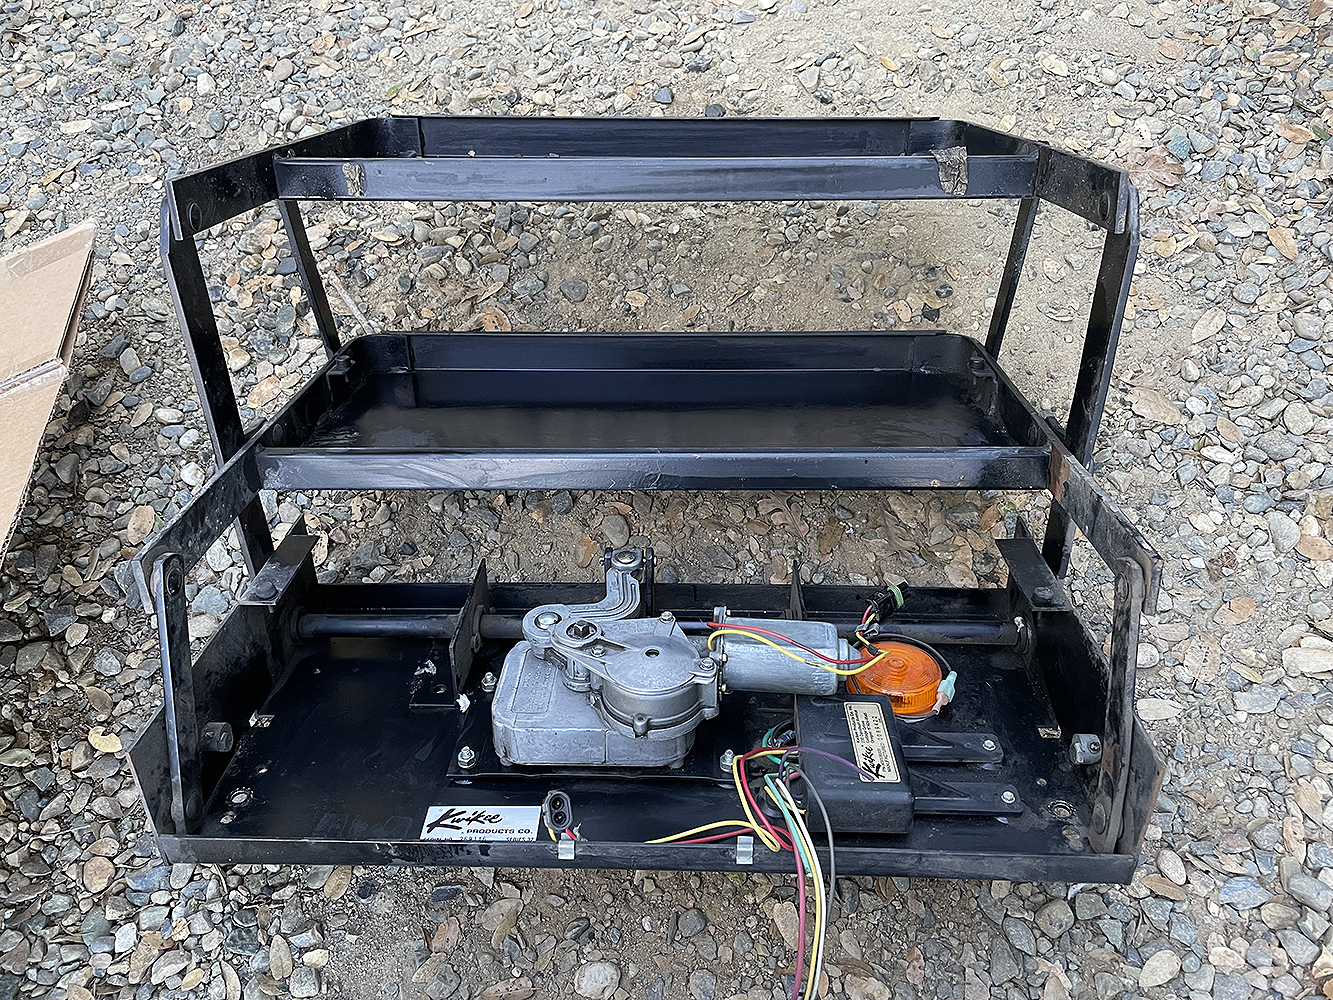
Went out to our RV last week and when I opened the RV door, the electric steps didn’t come out.
Normally, when the RV door opens, the stairs extend, and when the RV door closes the stairs retract. But that wasn’t happening. I tried opening and closing the door several times, but no dice. Damn.
After reading up on electric steps and watching a bunch of YouTube videos, I came back the next day armed for battle. It only took about an hour to determine that the step motor was the cause of the problem.
What now?
Replacement motors cost between $50 and $200 depending on how much the seller was willing to gouge you. I bought the $50 one.
However, before I purchased the replacement motor, I thought I’d try fixing the broken motor. That’s free, right? Yep, but a real PITA.
Again, after watching a couple of YouTube videos on RV step motor repair, I was ready to tackle my motor.
First, here’s a basic diagram of an electric motor and what each part is called. During the upcoming video, I used a bunch of incorrect terms . . .

The Really Hard Part

Putting the Motor Back In
The good news is that after I disassembled, cleaned, and reassembled the step motor — it worked!
But getting the motor assembly back on the steps was a real chore, so I just removed the steps from the RV — they are very heavy.
Two Steps Forward . . . You Know the Rest
After removing the steps from the RV, I reattached the now working step assembly . . . which was FAR easier to do outside the RV instead of under the RV.
Then I reattached the steps and tried them out, and now . . .
When I opened the door, the steps went IN.
When I closed the door, the steps went OUT.
I called it a day.
Victory!
After a good night’s sleep, I decided to give it a final go before giving up and letting the local RV shop repair the steps.
When I slid under the RV for the umpteen time, I noticed that I had attached the motor differently from its original position:

By the way, I still have that $50 replacement motor. Just in case.
Feb 13
Feb 5
File these under Winter projects . . .
Solar Project Update
First, the Design Phase of our RV’s solar panel project is pretty much done.
Here’s the updated design schematic:

While the above schematic is a necessity, so is the layout of where all the stuff will go. Remember, it’s a small RV. To that end, we created “Cardboard Solar” – life-size cardboard representations of all the major solar equipment. It really helps to actually see what fits where . . .


Batwing TV Antenna Replacement
The old 21-year-old antenna finally gave up the ghost and refused to move. Here’s the new antenna . . .


Fridge Vent Replacement
The original vent was cracked which could allow water to enter the refrigerator compartment. Getting the original off was a chore as it was really really glued down.


