HughesNET Gen 5 Satellite Internet
Updated: February 5, 2020

HughesNET Gen 5 Tripod System
I acquired a HughesNET Gen 5 tripod satellite system at the end of June 2018 because I wanted an alternative or “Plan B” to our Verizon Internet data plan as we travel across the country.
With a satellite system, I should be able to get an Internet connection no matter where we camp. Theoretically. The HughesNET Gen 5 dish is large (3′ 3″) and takes up a fair amount of space at a campsite. Time will tell how it ultimately works out.
Here are links to my first installation and initial speed tests:
- My 1st HughesNET Gen 5 Setup & Connection
- HughesNET Gen 5 – 1st Evaluation (June 2018)
- HughesNet Gen 5 – 2nd Evaluation (Dec 2018)
- HughesNet Gen 5 – 3rd Evaluation (April 2019)
- HughesNet Gen 5 – 4th Evaluation (May 2019)
However, I wanted to provide more detailed information on setting up a HughesNET Gen 5 portable dish. Here we go . . .
SIZE MATTERS
Following are photo comparisons between a typical satellite TV tripod dish (a DISH 1000.2) and the HughesNET Gen 5 tripod system:
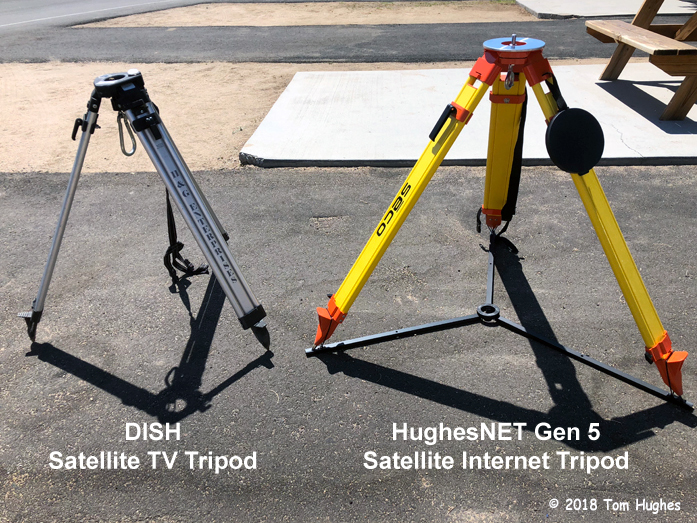
DISH TV 1000.2 vs HughesNET Gen 5 Tripods
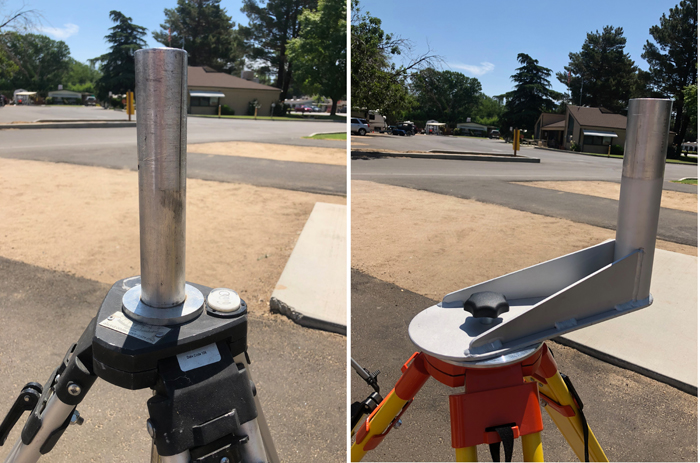
DISH TV 1000.2 vs HughesNET Gen 5 Tripod Dish Mounts

DISH TV 1000.2 vs HughesNET Gen 5 Tripod Dish Rear Views
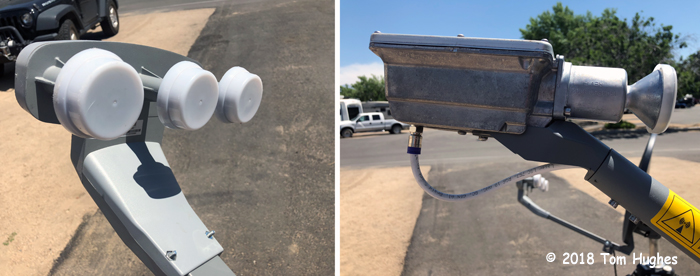
DISH TV 1000.2 LNBs vs HughesNET Gen 5 1W Radio

DISH TV 1000.2 vs HughesNET Gen 5 Front Views
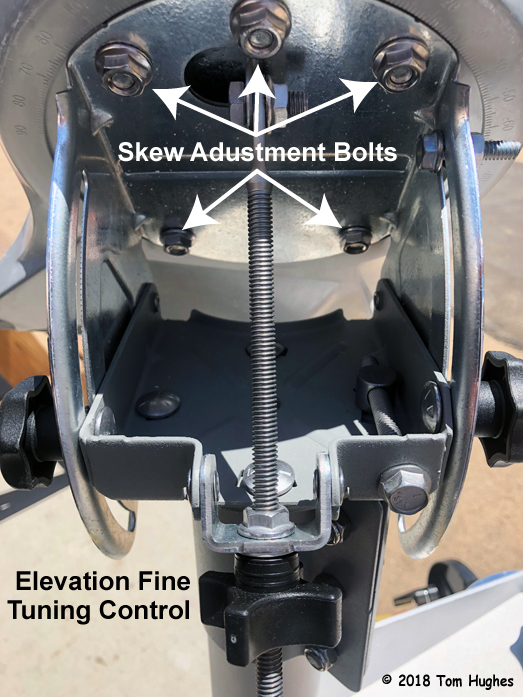
HughesNET Gen 5 Dish Alignment Assembly
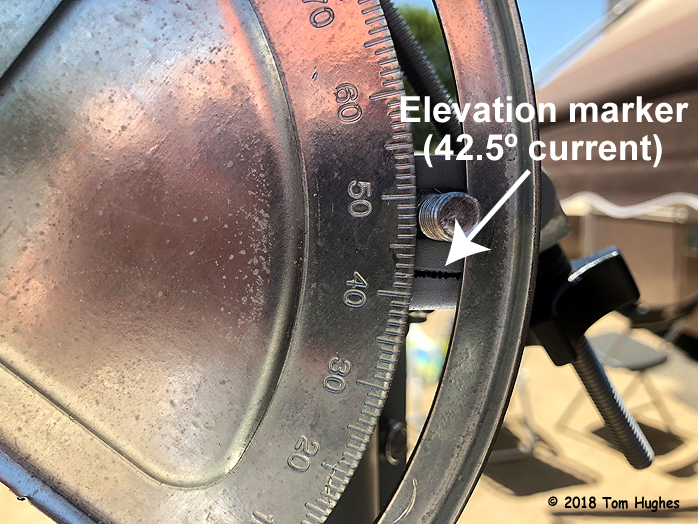
HughesNET Gen 5 Dish Elevation Indicator
HUGHESNET GEN 5 INSTALL
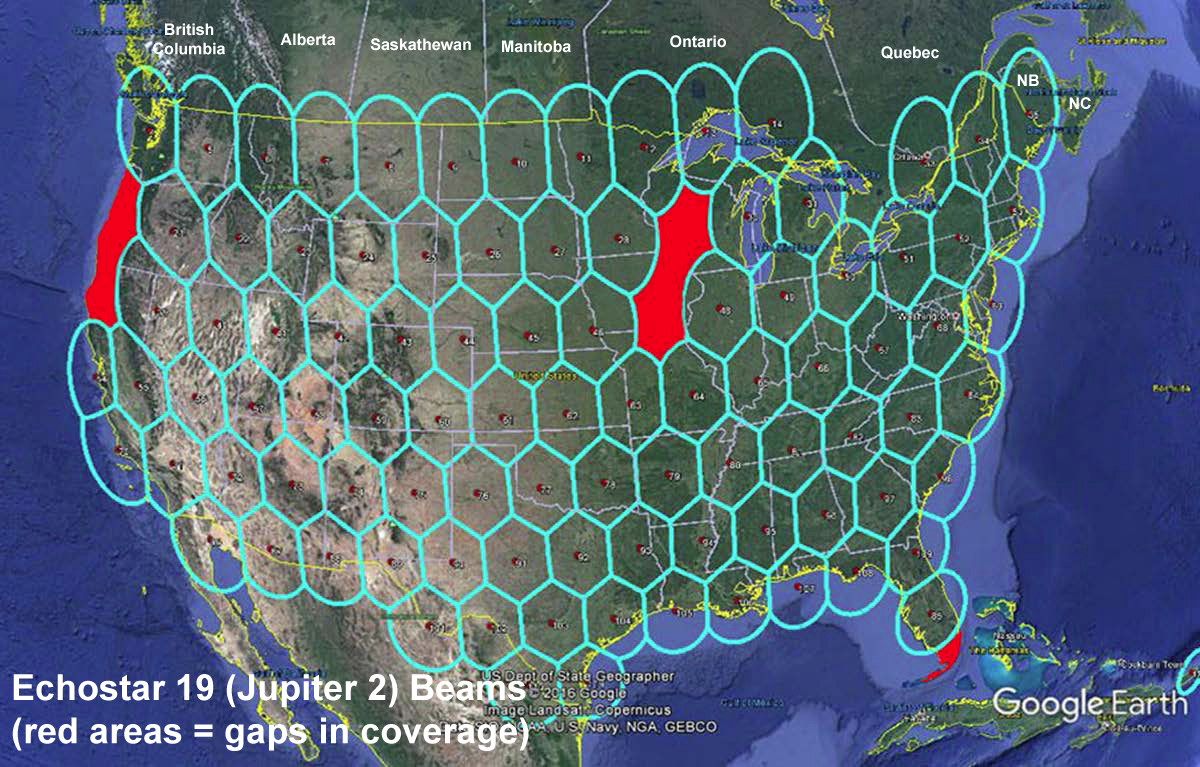
HughesNETGen 5 Coverage Map
Here is a summary of the installation steps:
- Each time you move your HughesNET Gen 5 tripod dish to a new location, you must find your GPS coordinates in Degrees and Decimal Minutes (DMM) format. I’ve been using this website – www.get-direction.com
- At this point, you do NOT have your HughesNET Gen 5 dish set up and connected to your HT2000 modem:

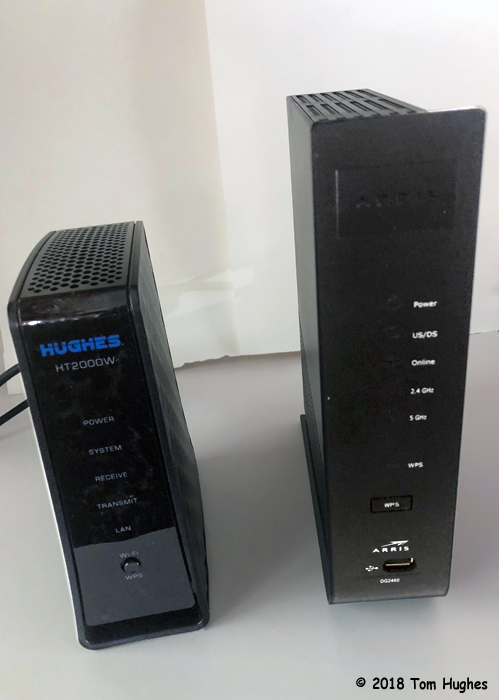
HughesNET HT2000 Satellite Modem vs Arris Cable Modem
NOTE: There’s a reason I compare the HT2000 to the Arris cable modem – both use the same IP address (http://192.168.0.1/). Therefore, only one of them should be on at a time. Check the IP address of any other WiFi routers you’re using before firing up the HT2000.
- Next, power on the your HT2000 modem (still not connected to the HughesNET dish), and navigate to the Install Parameters screen:

HT2000 Install Parameters screen
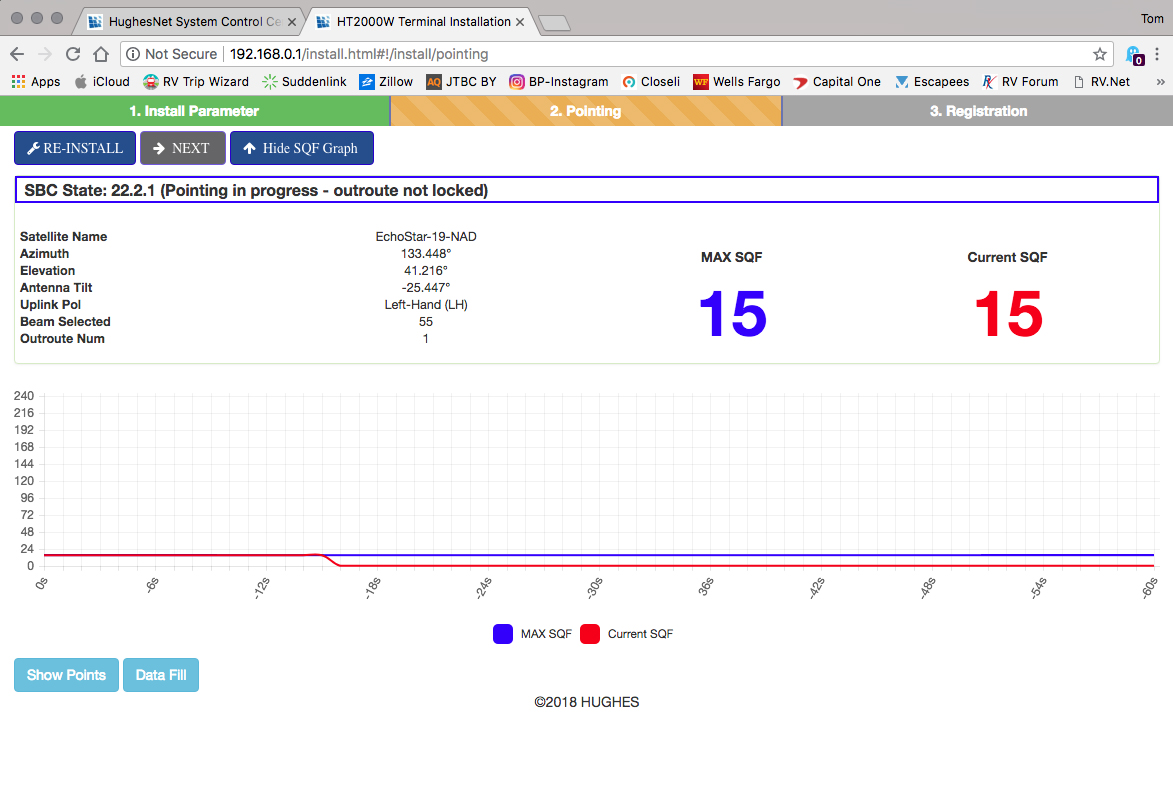
- Enter the GPS coordinates in DMM format for your current location. Then press Submit. The pointing parameters for your current location (Azimuth, Elevation, Tilt or skew, and Polarization) will appear:

HT2000 Pointing Parameters
- Next, turn OFF the HT2000 modem.
- Using the values from the Install Parameters screen, set up the HughesNET dish with the DAPT2 connected between the satellite dish and the HT2000 modem.
- Turn the HT2000 modem back on.
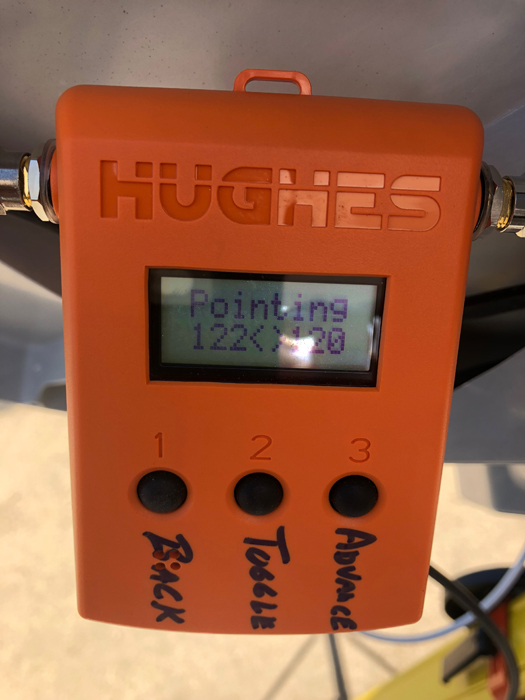
- Start the satellite acquisition process using the DAPT2.

Peak the DAPT2 Meter
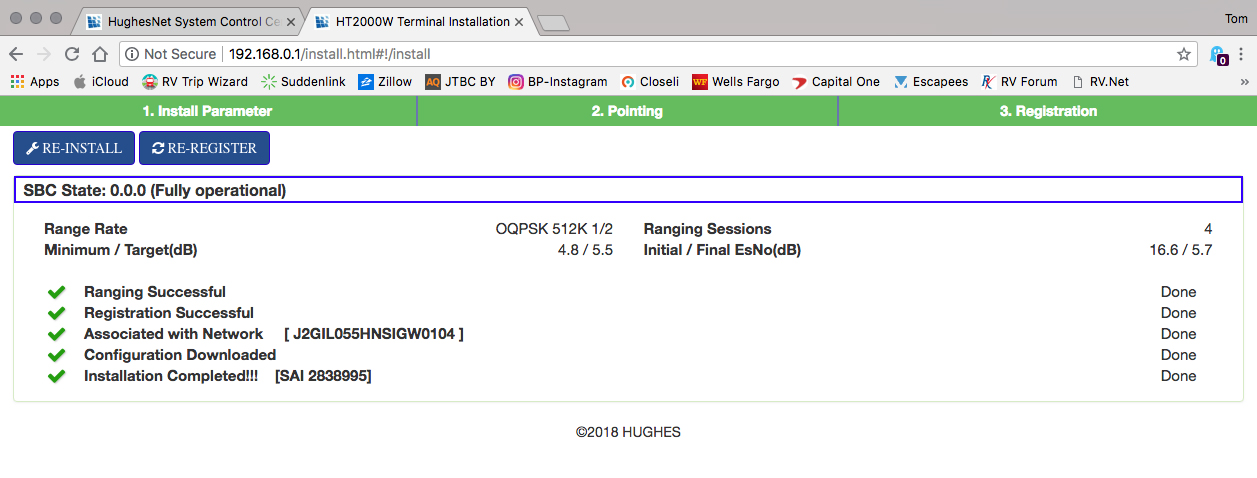
- Next, after peaking the DAPT2, check the status of the Install Parameters screen:

Signed, Sealed, and Delivered
- If the install has successfully finished, shut down the HT2000 again. Then disconnect the DAPT2 and connect the HT2000 directly to the dish radio. Finally, power up the HT2000 one last time. In a bit, your HughesNET Gen 5 WiFi network should be up and running.