We’re talking about two Fan-Tastic Fans which we recently installed on our RV roof. Explanatory pictures follow . . .
The First Fan Install
The Old Fan Over the Bathroom. It had two speeds – on & off and had to be hand cranked.First step in removal – scrape the caulk off.Unscrew the bolts holding the fan to the roofPry out the old fanBathroom view with fan removedNew fan inLiberal doses of Dicor around all the edgesWe added a cover over the fan so we could use it when it’s raining
Second Fan Install
We ordered the same model fan for the 2nd install, but Camping World sent the wrong fan, but we used it anyway. We’re going camping soon and there’s no time to return it and get another fan.
Anyway, 2nd install looks remarkably like the first fan . . .
Off with the caulk & pry outSecond fan had LOTS of wires, but we only needed two . . .Power!All done
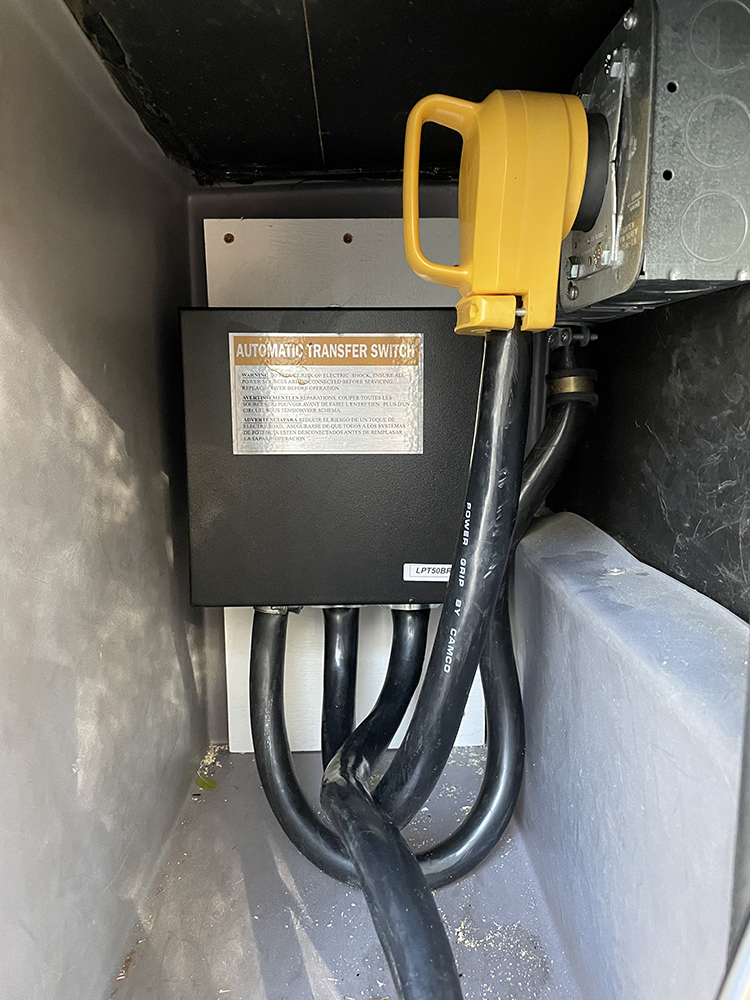
It’s the same switch we installed on our 2001 Newmar so we felt comfortable installing it. This transfer switch uses DC relays to reduce hum. It works.
The plug is the generator outlet. Now there’s no need to manually move it.
However, the new power cord we installed was now too big to fit through the existing hole in the compartment.
So, used a 5″ hole saw to cut out a big enough (barely) opening for the new power cord.
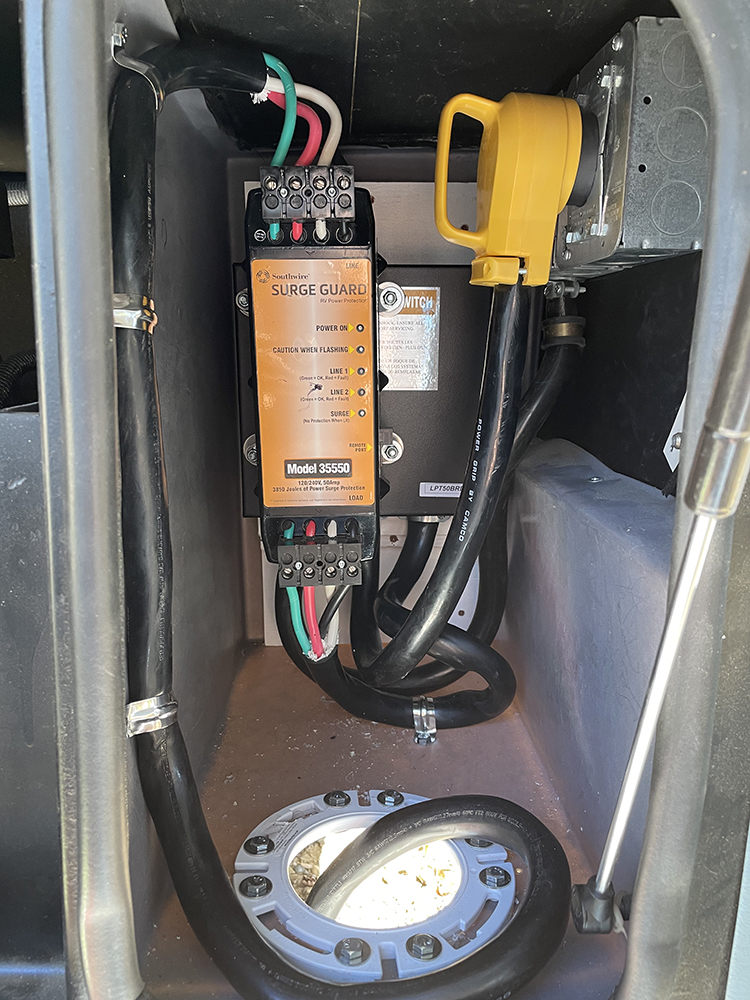
The wiring into and out of the Model 35550 surge guard leaves a lot to be desired. For example, while the screw-down wiring posts secure the wire well enough, there is no protection for the wires into and out of the unit. The surge guard installation instructions tell you to secure the wires within 7″ of the unit, that didn’t seem enough for us, especially in this cramped electrical compartment.
So we installed a plywood faceplate over the entire Model 35550 . . .
Klunky, but effective & the 25′ power cord still fits inside
This was especially tricky. Here’s the finished product . . .
The Problem: How to Run Wire from the Surge Guard Monitor to the Surge Guard itself?
First, take everything apart
Next, pull one end of the cable up to the monitor without damaging the cable or anything else
Then pull the other end of the cable under the RV, through a couple of compartments to the Surge Guard
Next, we have to give a shoutout to the no-longer-existing National RV company for their workmanship.
One of the biggest PITA when running wire under an RV is getting it from compartment to compartment without drilling through walls. In this case, our thick steel Sea View walls.
But National RV provided a VERY CONVENIENT solution: Knockouts. You know, those circular tabs on metal electrical boxes that you can “knock out” to run wire.
National RV put knockouts on our Sea View’s compartment walls . . .
Ok, we brought our new-to-us 2001 National RV Sea View RV home to Mariposa on Tuesday, October 5th.
We’ve been very busy getting it ready for next year as we plan to travel back to Wisconsin in Spring.
Though winters in Mariposa are nowhere as bad as Wisconsin winters, it still gets cold here which making working outside problematic. So we’re rushing to get as much done as we can.
Here’s what we’ve been up to . . .
Day 1 – Wednesday, October 6
Inspected the major systems: water, electrical, and HVAC as much as possible. For example, tested both AC to see how much they cooled. Very much in fact. Then tested the propane heater. Fine also. Turned the refrigerator on and tracked the freezer and fridge temperatures. Both were very much in spec – freezer < 10 degrees F and fridge < 40 degrees F.
The hot water heater works, but the relief valve leaks so ordered a replacement. Found out that our water heater runs only on propane, not electricity.
Discovered that our Sea View does not have a transfer switch that switched between external (“shore”) power and our RV generator. To use the generator, you have to physically attach the shore power cable the generator’s outlet. Since both our other RVs had an automatic transfer switch, we’ll be installing one on the Sea View (more on that later).
Day 1 Photos
Found out that ALL the inside and outside cabinet support struts needed replacing
Removed Both TVs (living room & bedroom) – Very Heavy Cathode Tube TVs from Long Ago
Removed Both the Carbon Monoxide & Propane Gas Detectors – Both Units Long Expired. Replaced with a Single Dual Detector.
Behind a Plumbing Panel Noticed Large Gaps in Flooring – Mouse Highways that We’ll Fill with Expanding Foam
Day 2 – Thursday, October 7
Because the couch was not long enough to lay on comfortably, we decided to remove it and eventually replace it with one to two recliner chairs.
The bedroom mattress went the way of the dumpster too.
Day 2 Photos
Just 6 Bolts Held the Couch to the Floor
Sans Couch – That’s a Furnace Vent that was On the Front of the Couch
Installed a Floor Heating Register a Few Days Later
Sans Mattress
Parked the Sea View in Our Park’s RV Storage Area (VERY handy)
Day 3 – Thursday, October 7
Just one item on the agenda . . . Dumping the RV’s waste tanks at the nearby Mariposa Fairgrounds . . .
This is the Only Picture You Really Need to See of This Event